Thanks for visiting my blog.

Het zou leuk zijn wanneer je een berichtje achterlaat. :-)
I would appreciate a little message. :-)

Hierbij wil ik Petra bedanken want dankzij haar geweldige site,
www.poohbeers.eigenstart.nl, ben ik met de bouw van mijn poppenhuis begonnen.

Thanks to Petra. Without her nice site, www.poohbeers.eigenstart.nl, I would never been started with my doll house.

Ik probeer de dingen die ik maak zo goed mogelijk te omschrijven maar er kunnen soms typefoutjes in de tekst staan dus controleer van te voren even of het allemaal klopt.

The thing I create I put on my blog. Although I try to make no mistakes it's possible that something went wrong so please check before you make a copy.

zondag 26 augustus 2012

I'm still in paper pottery .....


It's still not perfect but it's allowed to stay in the doll house when that's ready. The bowl is perfect but the jug needs some improvement. 


The copy gel and the copy of the roses are beneath a sheet of wet kitchen paper.


How to work with copy gel you can read in an older post. Now I glued the copy gel to the paper jug and bowl with that same copy gel. When it's dried well, I put nail polish on the jug and bowl.


As you can see the bowl is perfect. To avoid seeing the ugly bottom of the jug, I glued the jug into the bowl so it's hidden.


On these small items you see every mistake you make and when you make a picture with your nose almost in the bowl you even get more critical.

Because of the nice weather in the Netherlands I did try to make a copper kettle from paper also. I think I should practice more with the paper.


I glued two of these bowls together with wood glue. I made two smaller rolls of paper. One for the lid and one for the spout.

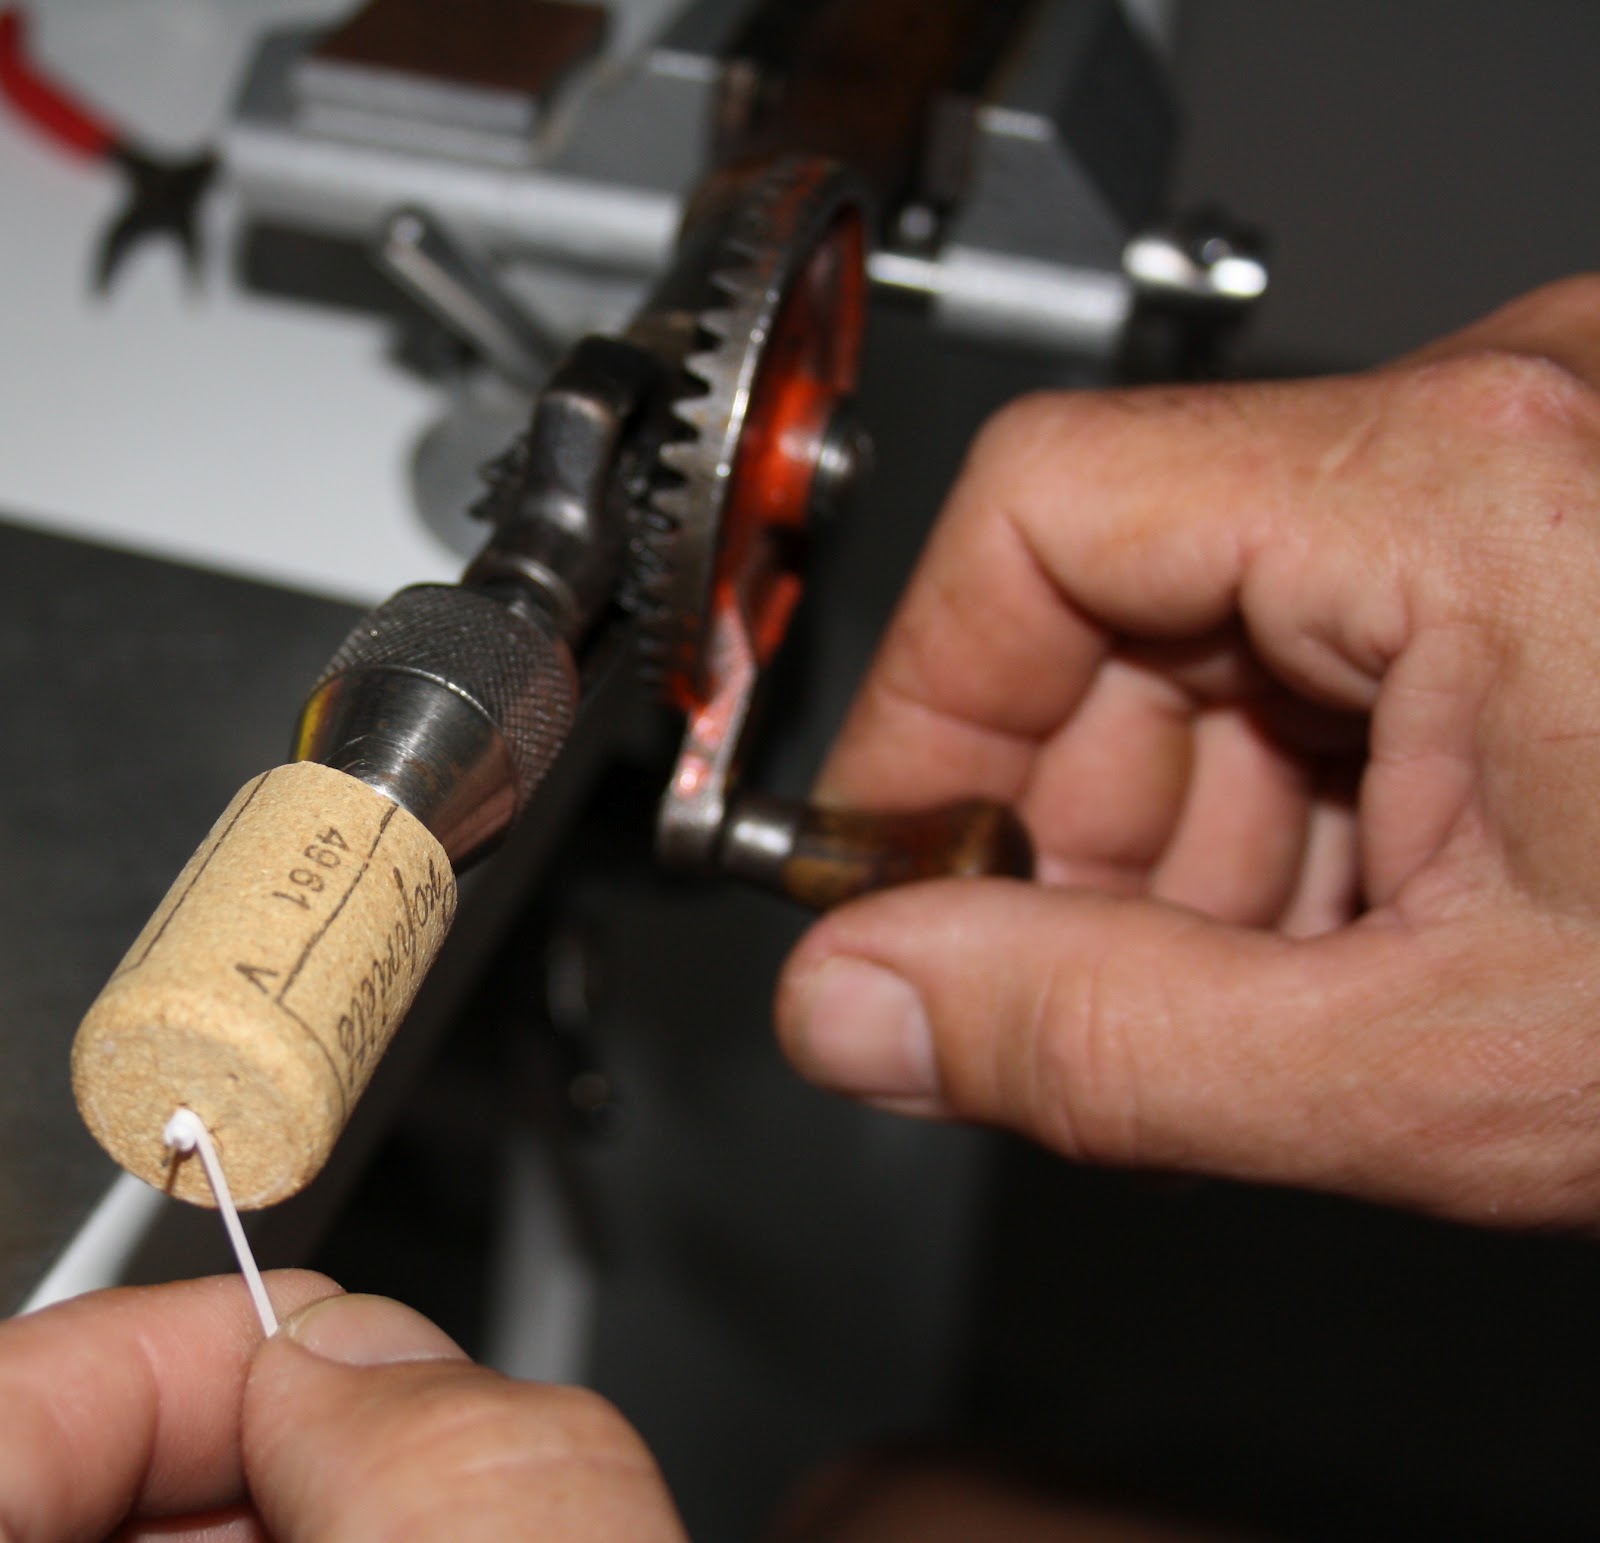
I didn't use the met 54 but the Hembrol met 12.


From paper I cut two small pieces to fix the handle of the kettle. On top of the lid I put a small bead. The color of the bead doesn't matter because you'll paint the whole kettle copper.


For the handle I used copper binding wire that's used by florists. And a bead. this bead I painted white.


Here you can see my weakness. The handle is a bit longer on the right side. The spout needs some work also. So to be continued. It so much fun to make these little things. You don't need much material and working space. Only lots of sanding paper and PATIENCE.

Enjoy your week and play with paper !!!


dinsdag 21 augustus 2012

Troubleshooting

First I want to give a warm welcome to my new followers. I am glad to see that people are interested in the things I do.Criticism is always welcome especially when it is constructive. So don't hesitate please.

For the first time I have used paper this way. So I have to do some troubleshooting first.
Painting the pottery isn't "easy". I used to much paint. So the surface isn't smooth. There are small paint drops everywhere. Stupid me....I painted it all again so  the paint drops were still visible. I was too eager. So PATIENCE is my word at the moment.

I like to put a Victorian rose on the  pottery.

Here is the pattern 1:12 of Victorian roses.


I made a copy of this rose and glued it straight on. That didn't look good because you can see the lines of the paper. Maybe I had to paint around the paper before putting the nail varnish on the jug.


Wait !!! I still have copy gel. 


So I put few layers of copy gel on to the copy of the Victorian roses.Then I put it into the water. So the paper will solve and the roses stay on the copy gel.


I removed the paper cautious.


By rubbing my finger over the paper.


Because I put the copy gel with the copy into the water the copy gel was becoming a little flexible. 
The second time I decided it was better to put a wet piece of kitchen roll paper on the copied paper.


So only the paper gets wet. Not the copy gel. So the copy gel didn't get flexible. After removing the paper I glued the copy gel on the jug. The picture is not as bright but it looks a little old now.


The jug isn't perfect but it are practice pieces. Now I'm going to try to make a perfect one. 
Because the  people living during the Victorian period had a jug and bowl in the bedroom to wash themselves before entering the bed.


So here they are ... my practice pieces. Now I go for the real thing ..... enough practice and I hope to show the perfect bowl and jug in a week.
Therapy time again....cutting paper strips....rolling them with my hand drill.....and forming bowls.....wood glue.. paint and so on and on....

Frans is still working on the staircase of our house so the staircase of the doll house has to wait for a while but that will be continued also after our holiday in a few weeks. We 're going to Portugal soon to do the garden and the house.


Patience and perseverance you need for a dolls house or a thick wallet ..... ;-)

Tips are always welcome as well as constructive criticism.

Enjoy your week !!


dinsdag 14 augustus 2012

Creating jug and pottery with paper.

First of all I like to thanks Kris for sharing this wonderful idea of making pottery from paper

http://1inchminisbykris.blogspot.nl/

The first thing you have to do is cutting a lot of strips width 0,3 cm.


Then you glue the strips together with wood glue. For the jug I needed 8 strips.

Now you have to roll up the strip.


That's a piece of cake. Put a little glue at the end and glue that on to the roll.


You push gently on the roll. So the middle comes out. Be sure that on the outside the paper has a overlap from 0,2 cm. This makes it easier to sand the outside.
You put wood glue inside the bottom of the jug. Be sure that the glue is all around the inside. This makes the bottom solid. Then wait for a day to let the glue curing. Now you can sand the outside.


Now you glue the body pattern on the bottom.


Glue this all together. For the right instructions I recommend http://1inchminisbykris.blogspot.nl/
The pattern is also available at this blog.


It's important that you remove the glue before curing. You can't sand wood glue. You'll get strange bubbles on your jug when you don't remove it immediately.


I could use some therapy. So I went cutting paper again and again. I glued 14 strips together. The cork was to small for this length of strip to roll it against. So I glued  ivory cardboard on to the cork.


And I could enjoy myself.


The big one of 2,8 cm can be used for a bowl.


The three downside are sanded and the three above still need to be sanded. Now I have painted them with Humbrol enamel satin 130. When ready I will show them off.
Now I'm working with copy gel. To put a print of roses on the bowl. When that's ready I will put it on my blog.


maandag 6 augustus 2012

The hand drill of my father in law.


First a welcome to my new followers. I'm happy to see that there are more people who likes to make little things.
I was so happy that I inherited the hand drill from my father in law. That was the only thing I really wanted. I thought that thing can become handy for working on my doll house.
I don't know whether these hand drills are for sale these days. Maybe secondhand.
My husband saw me struggle with the paper and a needle in a cork. He wondered what I was doing. I explained the story of  http://1inchminisbykris.blogspot.nl/

After a lot of thinking he made me a new machine. This makes rolling up the paper a lot easier.  Voila this is the construction.


Needle, cork, hand drill and vice. When you put these things together the rolling up of paper goes a lot easier.

Now I place pictures of all the things separate. 


You put the needle into the cork and then you place it into the hand drill.


Then you place the cork down to the hand drill. Now you can see the eye of the needle which I cut the top off. Between that you can place your paper strip and roll it on.


This is the hand drill. On the left is the place to put the drills inside but now Frans put the needle inside.


This is my little vice. 
When you put these things all together you get a machine to make paper rolls!!!


Frans is demonstrating how it works. What a wonderful husband. This makes it easy for me to roll the paper.  I was acting like a clown to make that rolls. Every time the roll flipped out of my hands or the paper went another way then supposed.


Now you only have to navigate the paper to the cork.


And turn the wheel of the hand drill. This is an easy way to make a roll of paper for the little things we make for the doll house.


As you can see there are four rolls ready. Now I have to cut paper to make the rolls. And my experience with making marble of wood I guess I need a lot of rolls because I have to make enamel of paper. It's a lot of fun to learn all those techniques you need for a doll house. What I like the most is sharing my experiences with my followers and I hope you can use some of the things my husband and I accomplice. I also likes to thank http://1inchminisbykris.blogspot.nl/  and http://englishmanordollhouse.blogspot.nl/
They inspired me and Kris does a lot with paper and Giac has an amazing doll house. I also like to read the blog of http://elgakoster.blogspot.ca/ and from http://inchscaled.com/ and this person I like because she's a friend that makes wonderful beats http://kralaria.blogspot.nl/ .


zaterdag 4 augustus 2012

Marble the steps of the stairs.


I hesitated. Should I use paint on oil base or gouache. I want to use my natural sponge so I was afraid that paint on oil base would give problems by cleaning the sponge.


Before using the natural sponge I put it in water for a day. So the sponge is wet everywhere.


These are the colors I used for marbling. I mixed them together.


I used tape to put the steps on a wooden strip.


It's an easy way to marble this way. You squeeze the water out of the sponge and then put the sponge into the plate with paint.You dab the paint on the steps.


I used a feather to make veins in the marble. I picked our parakeet for the feathers....;-)


This is the end result. The steps look like marble. First I put hairspray on the steps to secure gouache. Then I used gouache varnish glossy 074 from Talens. The first time we used varnish that we normally use for plain wood. That wasn't very successful so I had to sand the steps and start again. Next step will be putting the steps in the stair. That will take a while because my husband is busy wit our staircase. That could use a renovation also.