Thanks for visiting my blog.

Het zou leuk zijn wanneer je een berichtje achterlaat. :-)
I would appreciate a little message. :-)

Hierbij wil ik Petra bedanken want dankzij haar geweldige site,
www.poohbeers.eigenstart.nl, ben ik met de bouw van mijn poppenhuis begonnen.

Thanks to Petra. Without her nice site, www.poohbeers.eigenstart.nl, I would never been started with my doll house.

Ik probeer de dingen die ik maak zo goed mogelijk te omschrijven maar er kunnen soms typefoutjes in de tekst staan dus controleer van te voren even of het allemaal klopt.

The thing I create I put on my blog. Although I try to make no mistakes it's possible that something went wrong so please check before you make a copy.

vrijdag 29 juli 2011

oranges, orangejuice and more oranges scale 1:12.


I used this colors Fimo clay and mixed them together. So you make the inside of the orange.


1 part 014 and 1/8 part of 4 and 15.


For mixing the colors I use my pastamachine.


Now you mix these colors to make the parts of an orange.


1 part 014 and 1 part 0 and 1/8 part 17.


Repeat this till you got enough parts.


Now you have to make the peel. 


You have to squeeze gently and roll out until you get the right size for an orange.


When you want to make an orange you cut of a piece of 0,6 cm. and gently close both ends by pushing the orange clay over the inside of the orange.


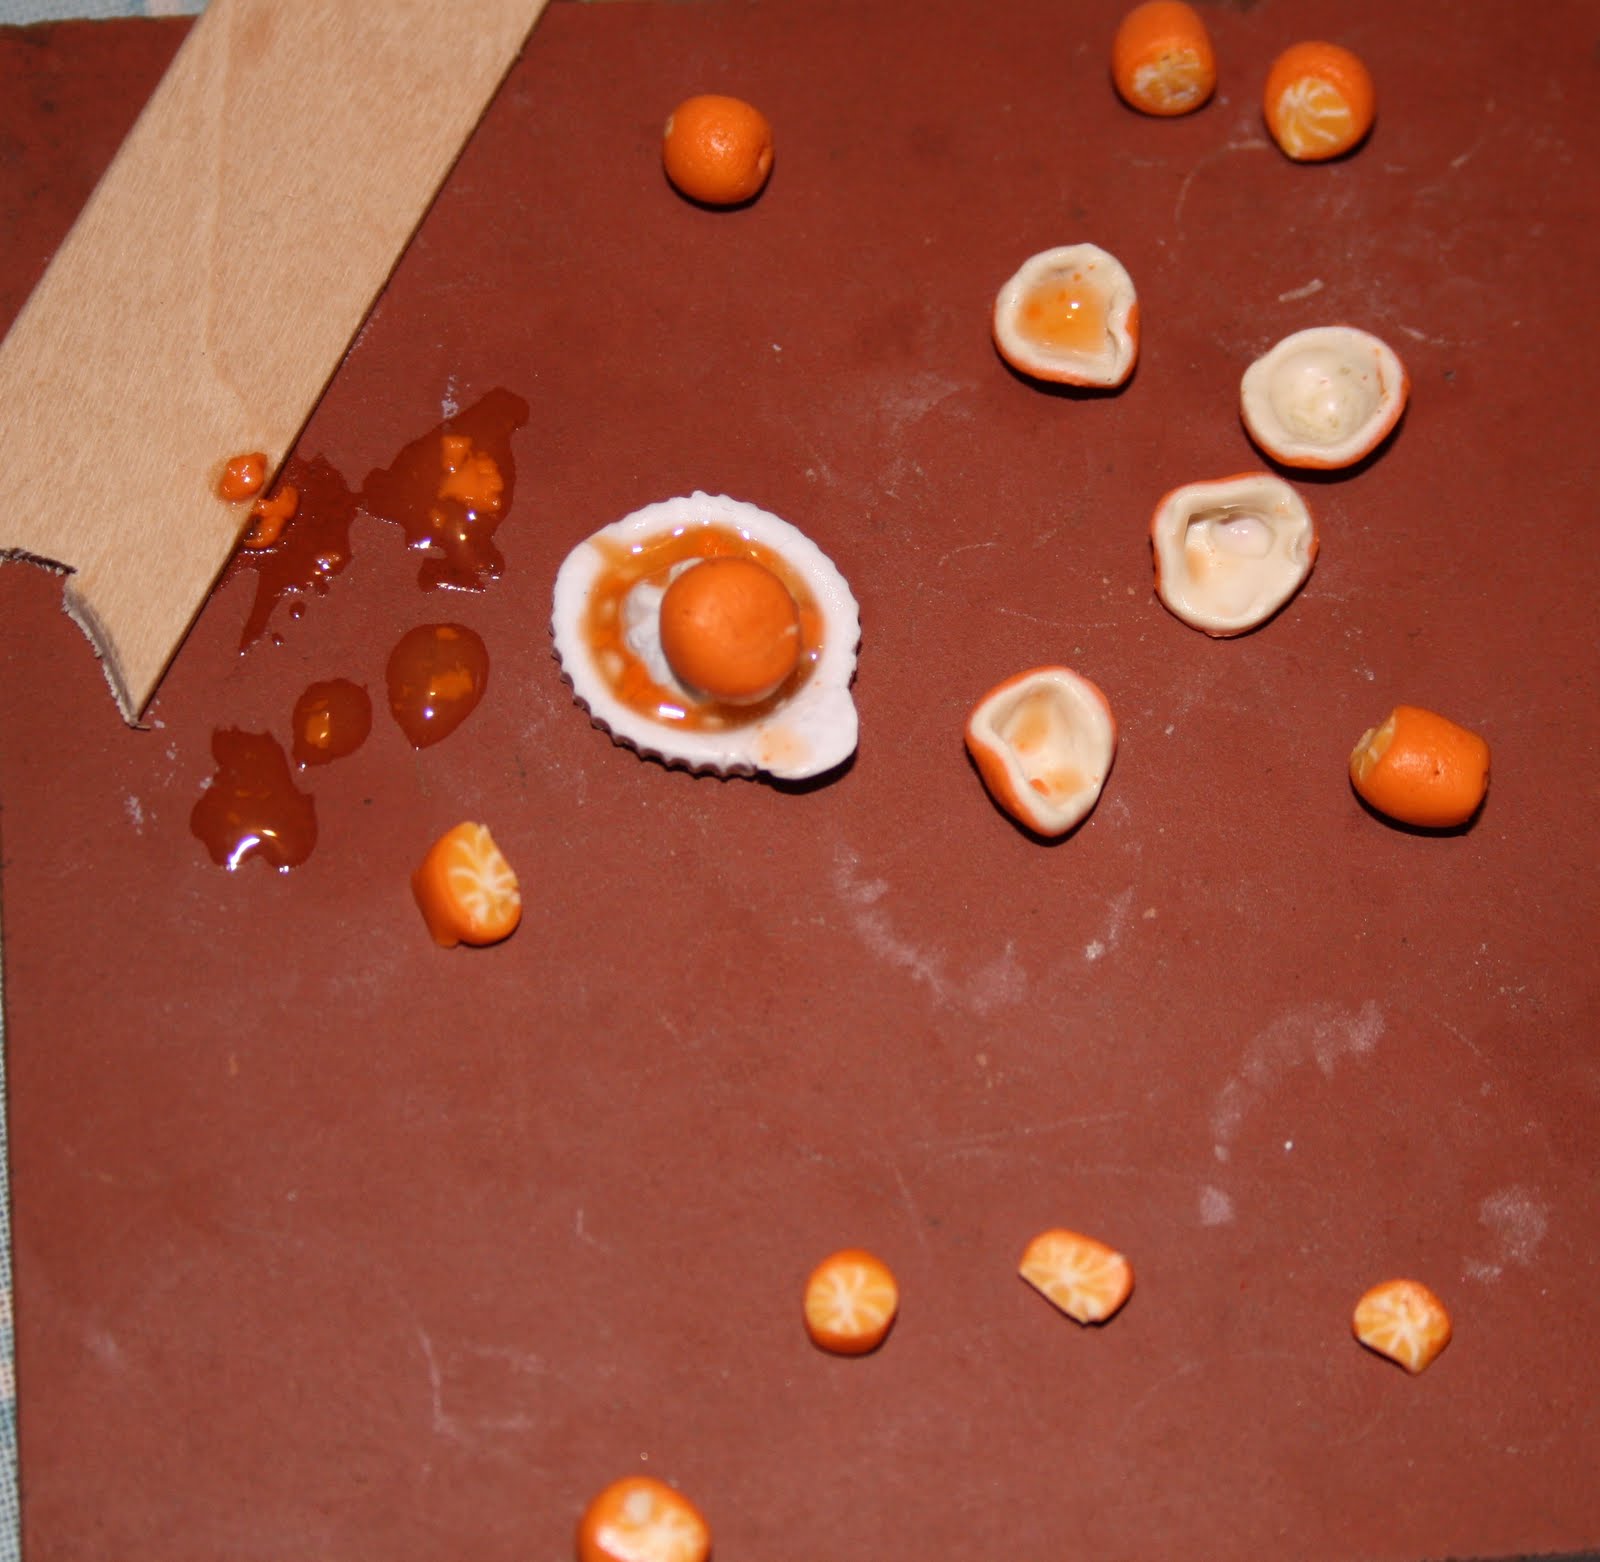
For the juice I use Fimo liquid and a little bit of the clay from the peel. Mix this very well and you see that the collor of the peel solves in the liquid Fimo.


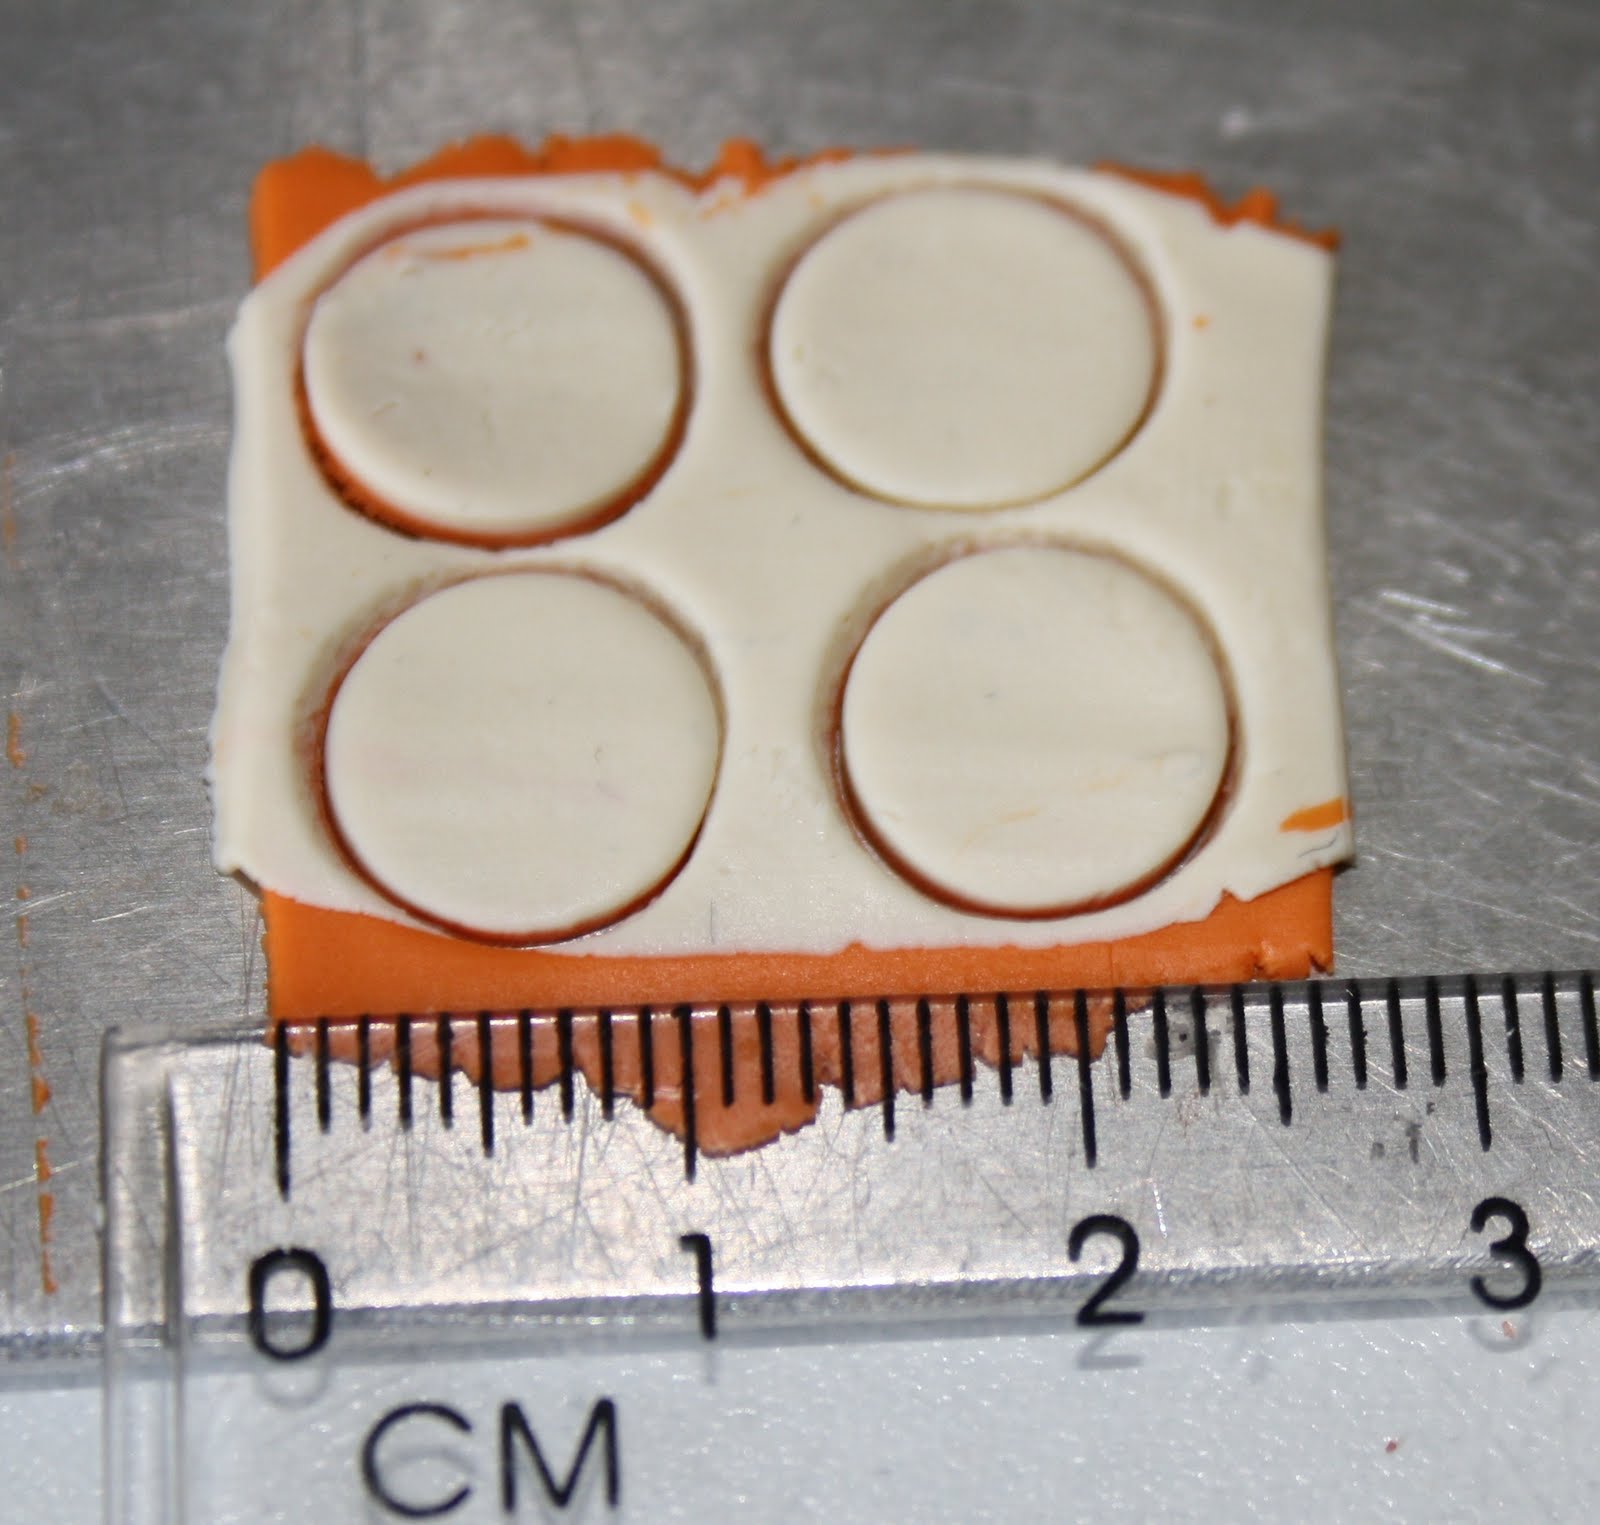
For empty peel you take the orange and broken white colors. Cut out a circle 0,8 cm. 

I used sandpaper and rolled over the oranges so the peel looks realistic. Now everything is ready to bake.


Ooops...I've spoiled some juice.

woensdag 27 juli 2011

Knives to cut or peel the oranges.

Still waiting for the clay I realized that I could use knives to cut the oranges.


I use the holder of a tealight for the blade of the knife.


 For the handle I used 2 pieces of wood that's 0,1 cm. thick. I glued it with the blade between the two parts of wood. I sand it and painted them with acrylic paint Burnt Umber. Now I have some old knifes.


Making a juicer.

While I'm waiting for the orange clay for my oranges I made a juicer.
First I made a mould from leftover clay.


Then I had to make the bottom of the juicer.
I used a marker and the cap of toothpaste.


The juicer is almost ready ta bake. 


woensdag 20 juli 2011

Orange crate

I think I need some orange pickers to fill my crates.


Orange crate


This are all of the parts you need.


I forgot to put the glue on the picture. This is all the material you need to build


donderdag 14 juli 2011

Orchid in Fimo clay.


I used these tongs for creating the orchid leaves in Fimo clay.


I put three circles together .


Them put two circles on top.


In the middle of the orchid I put a French lily.


One orchid flower.


The orchid is ready and I think it looks better with the clay. Practice a little more to get a perfect one. The root isn't perfect yet.

Arum made with Fimo clay.


I've put my pasta machine on number 3 for the thickness of the leaves. Now I also can use a center punch.


For the arum I use the heart form.


 I used sandpaper for the yellow pistil. It looks a bit natural after rolling.


For the stalk I used florist "iron" 0,5 diameter.


Form the petal by folding it around the pistil.


And then I have a posy.


I put the flowers in a vase. I used a bead from http://www.bindelsornaments.nl/joomla/  as vase.